CMDR Werdna のプロフィール > 航海日誌
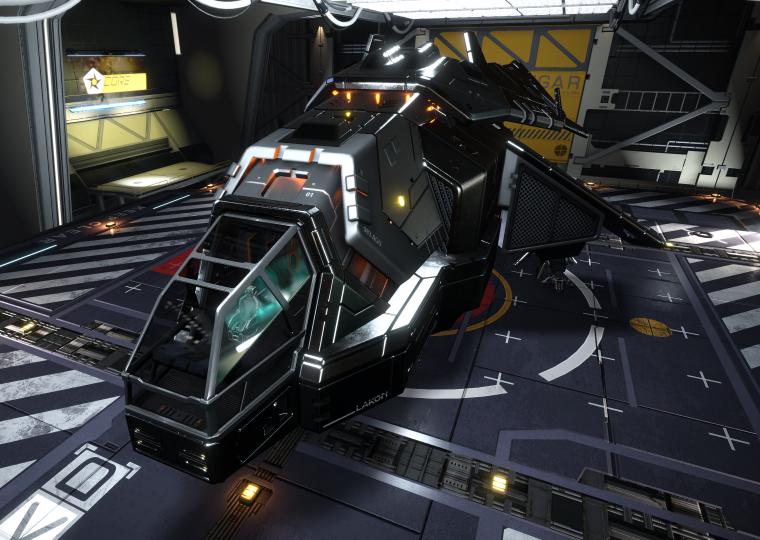
(Diamondback Explorer)
The WP3 "Bluff Point" meetup was scheduled the night before I arrived. It was on Trapezium Sector DQ-X c1-9 12 a at 14.0/143.6.
Barnard's Loop is very close here.

The nearby gas giant looked like a giant marble ready to roll down the canyon.

I stopped for the night on Witch Head Sector DL-Y d26 2 a.

The Witch Head Nebula was very close and large in the sky.

The meetup is supposed to be tonight, but I'm not going to make it.
Another day, another waypoint. WP2 "The BFG (Big Fiery Giant)" was on Betelgeuse 2 at 69.68/72.91.

Betelgeuse is a red super-giant, and has planets that orbit quite close to it. Not as close as Skardee, but close enough!
The WP1 "Barnacle Bluff" meetup was just one day later. I left quite late in the day, but it was only a few jumps and I arrived less than an hour later on Merope 5 c at -26.34/156.40.
Late in my day is still very early for Europe, so there was almost nobody there. The ringed gas giant in the sky provided some interest while I waited.

Eventually others turned up and we gathered around the green glowing barnacle.

The Crab Nebula Expedition kicked off on 11 June at Mitterand Hollow at 56.20/121.77 "Journeys Beginning".

I was not long back from Distant Worlds and was feeling a little burned out, but I'd signed up and so felt obliged to make the effort. One thing to encourage me was the fact that I was 92% Pioneer in exploration and needed just 8% more to make Elite.
My return from Distant Worlds coincided with the introduction of the Engineers. Selling my exploration data allowed me to immediately max out my reputation to grade 5 with Felicity Farseer and to grade 4 with Elivra Martuuk. Either of those ladies are good for a maximum increased range on the FSD.
I waited for a little while on the morning after the official meetup to see if anyone else might turn up, and an Imperial Eagle arrived.

The first Thargoid Barnacle was discovered around 15-Janurary - the exact time the Distant Worlds Expedition left!
Having returned to the bubble I took the opportunity before joining the Crab Nebula Expedition to fly out to Pleiades Sector JC-U b3-2 to take a look.

It was pretty blown up and stripped bare.
First of all I need to thank Erimus and Dr Kaii for organising the whole Distant Worlds Expedition. Without this trip I would still be poking around the bubble thinking about going on a great exploration. Now, with the help of not just these two great commanders, but over one thousand fellow great commanders, I've seen so many things on my "bucket list".
It all started at Pallaeni back on 15-January. I stayed up all night especially for the launch at 4AM local time, signing off at 5:30 to go to work! It was the first time I'd instanced with more than two commanders. And I think I got into the same instance as Dr Kaii on one occasion before the connection died and I found myself with Cmdr Baroness Galaxy among others.

The expedition did not start well. Three jumps in I found that I needed to rearrange my headset cable and while I was doing that my Asp ran into a star! So it was a quick backtrack to Tsakhmet for repairs before heading back out.
At the Lagoon Nebula I found my second ever black hole - Thor's Eye.
It was also while at Tinné's Endeavour (WP3 - NGC 6530 WFI 16706 A 1 a @-12.71/70.28) that I first saw the fleet flagship - the Zombie Wasp.

At Drake's Ridge (WP5 - NGC 6357 Sector DL-Y e22 2 @47.77/-95.71) I participated in my first SRV race. I probably came last, but at least I didn't blow up!

At Camp Uluru (WP8 - Speamoea WU-E d12-543 C 1 @-67.07/-104.66) I was doing some canyon driving when a commander blip appeared on the radar. Then another, and another. There was a whole bunch of them! And an Anaconda! I can't remember who they were (maybe the Rock Rats?) but it was memorable for running into a bunch of commanders in a random canyon.

After Mt Hillary (WP9 - Athaip CR-C b55-4 2 C @-15.82/-72.29) I got to my third major black hole - The Great Annihilator.
The next interesting event was getting to Sagittarius A*.

I missed out on the mass meetups at the black hole itself, but was able to meet up with several commanders at the base camp at Armstrong Landing (WP11 - Stuemeae KM-W c1-342 1 b).

The trip up to Gagarin's Reach (WP12 - Nyuena JS-B d342 4 f a @-66.88/-96.00) was well worth it. The view of the galaxy from way up above was awesome.

I tried going up from there as far as I could, to see how close I could get to Quemeou YE-A e0. I got as far as Quemeou AQ-Y d11, which was 73.99Ly short. Quemeou YE-A e8 was 43.27Ly away, which was within J3 range, but I didn't attempt that.

At the Chrea Cauldron (WP14 - Dryao Chrea VU-P e5-7481 B 3 a @-19.63/39.73) I met two other commanders with Asps with the exact same Orange Synth paintjob as me, so we had to line up for photos!

The meetup at The Mound (WP16 - Eok Gree TO-Q e5-3167 2 d @26.63/-120.95) was memorable for taking place in near complete darkness. The way SRVs lit up the volatile gasses in the crater just looked so cool.

170Ly away from The Mound is Dryao Chrea GR-W f1-3453. This system is notable for the planet A 2 being landable and having (at the time) the second-highest known gravity for a landable - 6.64G. It became the inaugural meeting of the "High-G Club". Landing was a little nerve-racking. My ship took a lot longer to slow down due to it diverting so much power to the thrusters keeping it up! Careful use of FA-off resulted in a gentle landing that didn't even ding the shields. Driving around in the SRV was different. Constant 1% hits to the hull resulted in only a short exploration. Bring lots of repair materials! Thanks goes to Cmdr grnbrg for the wing beacon in :-)
At Camp Amundsen in The Greeroi Veil (WP18 - Greeroi MD-Q d6-5 B 1 @-38.05/-82.51) I didn't get into the center of the nearby nebula, but with my short jump range I was able to get into a system that was inside part of an outer section of it. Such a beautiful sight with the nebula providing a very red colouration to the light, making the planet surface, the neighbouring moon, and my Asp take on shades of red.

Camp Amundsen was right next to a 16km high mountain, so of course I had to get in my SRV and drive to the top! It was a looooong way up, and sadly I missed a group of 15 or so SRVs who made the attempt as a group. That would have been fun! This was also the spot where my joystick decided to flake out and thrust my ship down into the ground for a bit - losing all the shields and 4% hull in the process.

At Shackleton Plateau (WP21 - Qautheia BA-A e0 A 1 a @74.07/141.47) there was a deep but narrow canyon separating the plateau from a nearby much smaller plateau. I wondered "aloud" on chat how many Anaconda's it would take to make a bridge, and in a blink there were ships organising one and SRV's trying and sometimes failing to cross it. Much fun was had, even though I almost boosted twice into the canyon walls, just pulling up in time on each occasion.

Then it was the crossing of the Abyss. The stars got quite sparse here, and it was sometimes a bit of a challenge navigating. Somewhere between the Sublustris Beacon (WP22 - Cheae Eurl AA-A e0 7 @-48.63/108.72) and Beagle Point (WP23 - Beagle Point 2 @48.56/-35.57) I crossed the 65000Ly from Sol club.
Before arriving at Beagle Point I stopped by Frawd's Legacy (Iorant JH-D c12-0) and tried to help Cmdr Baroness Galaxy find materials for Cmdr Frawd Digger, but something went wrong with the instancing and the others couldn't see me! Not even logging off and on would help. Sadly I had to leave them to it and make my way to Beagle Point.
Up until this time I had not used any jump boosts, which I thought was pretty good seeing as my Asp only has a 27.95Ly jump range fully laden (and it was - with Gold, Coffee and Tea). I consulted the recommended routes into Beagle Point and after trying various routes in the galaxy map, I found I could bypass the first sections of long jumps and reach Iorant MO-O b33-0 without needing a boost.
From there it was three basic boost jumps to Iorant NT-Q c18-0 followed by regular jumps until I reached Ceeckia QJ-P c22-0. To get from there to Beagle Point was another five jumps, two using basic boosts. That was a total of five basic boosts to get to Beagle Point where I had been expecting eight. Pretty good!
My time at Beagle Point was reasonably eventful. I met up with four other commanders and we drove our SRVs to the top of the nearby lit mountain peak.

I bumped into members of the Candyball Crew "driving" an SRV into orbit - and watching them get to 30km before losing the SRV. We found what was left of it on the surface.

In the early part of the week I flew to the Treehouse (Iorant FR-C c26-0). I needed to use a couple of standard boosts to get there, and unfortunately didn't meet anyone.
Next I flew to Podar (Myeia Thaa ZE-R d4-0). I tried to minimize the number of boosts needed to get there, ending up using just two basic boosts. Again, it was a lonely experience, as I met no one. Veteran explorers would say that is more like "real exploring" I guess.

I returned to Beagle Point following a different route to avoid the two basic boost jumps. I was able to get right back to Iorant MO-O b33-0 without needing any boosts, but I then had to follow my previous five basic boost route back to Beagle Point.
Just before I left Beagle Point for the last time, I drove a lap of the proposed Candyball Rally route. I wish the timezone of the actual rally was more friendly to my waking hours. Oh well, a lap by myself had to do. I initially met up with Cmdr Rewision at the wrong start point. After a bit we ended up going our separate ways, before we both found the correct start point independently.

When I departed Beagle Point I wanted to find a lower boost count route out to the galactic arm. I found that I was able to get out of the Beagle Point region into the easily navigable region of the galactic arm using nothing more than the two basic boosts required to get me out of Beagle Point to Ceeckia QJ-P c22-0. Start of my Flight Log home.
What I discovered is that about 1000Ly before (east of) Beagle Point the galactic arm in that area splits into two. It's probably only noticeable due to my relatively short jump range. Beagle Point is on the outer part while most suggested navigation routes start on the inner part. The large jumps required to cross between the two can be avoided if you tend towards the outer side of the galactic arm well before you get to Beagle Point. I think Ceeckia UY-G b44-0 is a good place to aim for before turning towards Beagle Point. Another bonus of this route is that it goes right past the Treehouse.
In short, that means it is possible for my 27.95Ly range ship to reach Beagle Point using just two basic boosts for the entire trip from the bubble! It is also possible for me to reach Podar using no boosts at all, although to do that from Beagle Point would require backtracking east 1000Ly, before heading west 2000Ly to Podar - a very long round trip!
My return trip was via the Sagittarius-Carina arm.
On the way back there was one occasion where I suddenly found I didn't have enough fuel for the next jump - I'd let my tank run almost dry! Luckily there was a scoopable 9Ly away that was in range.
Half way back to the bubble I landed on Hypaa Byio ZE-A g1 B 1, a 1.55g icy world that was more misty than I have ever seen. I drove my SRV nearly 2km away from my Asp and it almost disappeared in the mist!

Later on while I was fooling about in the SRV on Pueliae IT-H d10-1 A 1 a, I noticed Cmdr Whiterose approaching the nebula. I sort of expected them to drop down to the SCM/FGE Camp 6 location, but instead they powered on towards Camp 5! That was the closest I got to meeting another commander on the trip home.
Finally, after all the DWE travel out to Beagle Point and back again, I had my first "roasting" with a close binary star at Eifogy XA-Q c8-5! My AFM, which until this system had not needed a refill, finally ran out of ammo. I had been keeping materials for one AFM reload on hand. Now I needed to prospect to make sure I had another reload on hand.
There was one final bit of sightseeing before returning to the bubble - VY Canis Majoris - the largest star in the game!

I arrived back to the bubble at Hedin Station, Bwgcolmasci on 25-May. I had wanted to get back to the bubble before the Engineers update with the improved NPC AI. I got back with about 2hrs playtime to spare that night. The next night the servers were down for the update. In other words, after more than fours months travelling, I got back with about two hours to spare!
On the way in I experienced no interdictions, didn't even see any ships until entering the system. I chose Bwgcolmasci because according to eddb.io it was the closest system to VY Canis Majoris that was with Li Yong-Rui and had military hull, A0 shield boosters and point defence upgrades for my Asp Explorer.
My ship hull at the end was 84%. That was caused by: one time forgetting to turn shields back on before landing (5%), one accidental emergency stop (4%), my joystick getting stuck thrusting down one time while landing (4%), and falling asleep three times while fuel scooping (1% each time). Total repairs: 10,798Cr. Four tons of gold I picked up on the trip and sold for 41,144Cr easily paid for that, not that I needed it with all my exploration data to sell!
I was Ranger 6% on leaving, all my SRV driving getting me up to 12% on return. After selling 127MCr worth of exploration data, I got up to Pioneer 92%. It also bought me allied reputation with 11 of the known system permit-giving factions, level 5 access with Felicity Farseer, and 87% towards level 5 with Elvira Martuuk.
I expected to get at least one Earth-Like World with my name on it for the trip - I got 28! Only one that hadn't been discovered while I was there had been handed in before I got back.
I'm sorry, but I'm not doing another 4+ month expedition again. Except, you know I haven't been over in the "western" side of the galaxy. Hmmm, Frameshift drive charging!

